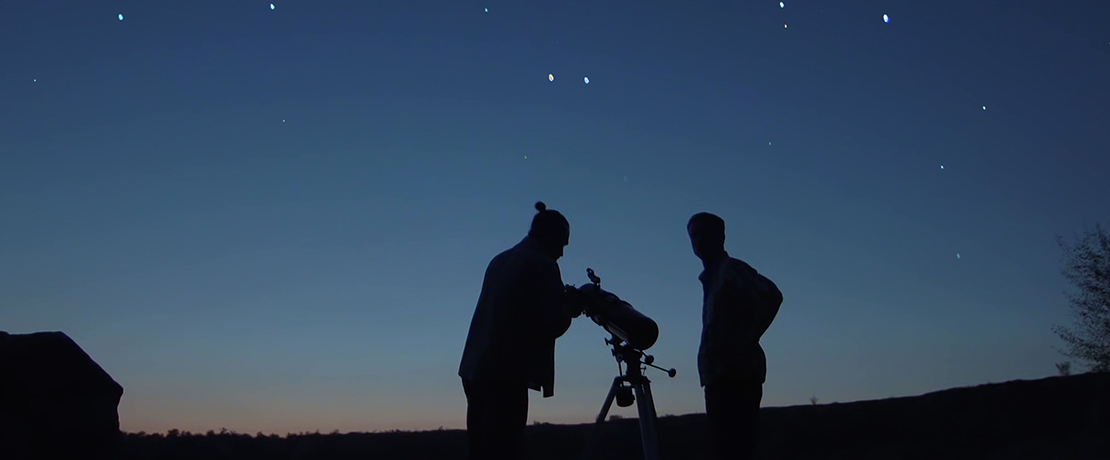
Astrophotography for beginners
We can usually see the moon and weather permitting, and we can often see quite a few of the brighter stars and constellations and capturing these on a camera is really special.
Astrophotography is a specialised area of photography, usually requiring special equipment, such as a tripod, a telescope, filters, and/or a camera with a suitable lens. Astrophotography refers to the close-up photography of celestial objects, which makes such photography out of the reach of most of us.
However, even with a reasonable compact digital camera, even your smartphone, you can experiment with photographing landscapes at night, including the night sky in your photos. You do need a few bits and bobs to get started, but these items are far more affordable than the equipment needed for true astrophotography.
1. A tripod/phone stand
Some way to support your camera or phone is important because photographing anything at night requires the camera to remain absolutely still for a number of seconds. It’s quite difficult to hand-hold your phone or camera for much longer and a fraction of a second, so being able to set the camera down is essential.
If you don’t have a tripod, you can just set your camera down on a fence, a wall, or even the floor.
2. A camera or camera app with a long exposure feature
Usually, compact cameras tend to automate everything, so yours may not have a manual shutter setting. Some of the more advanced compact cameras have manual modes, and almost all DSLRs or compact system cameras will have very low shutter speeds (usually up to 30 seconds) and perhaps a “B” setting, which allows you to keep the shutter open as long as you like – hours, even.
Default camera apps (the ones that are pre-installed on your phone) usually don’t support shutter durations beyond a few seconds, but there are alternative apps that give more control. Camera apps also have “Nightscape” modes, which emulate long shutter speeds by using software to improve image quality. Some phone cameras may take several photos in quick succession, combining them into one image later.
It is a good idea to use your camera’s countdown timer to click the shutter open, otherwise it’s very easy to introduce vibration as you press the shutter button. This also applies when using your phone.
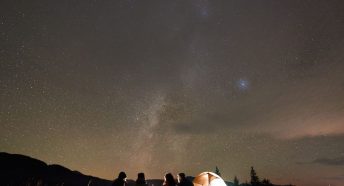
3. A good vantage point *
The further away from light pollution you can get the better. Our eyes do a good job of balancing the colour from streetlights, and we generally don’t notice moisture in the air. In a long exposure photograph, though, these things become clearly visible.
Ideally, head to the top of a hill so that you’re way above any lighting and the results will be much better. If you can climb a mountain of several hundred metres, then you’ll be in thinner air which will give you sharper images. Of course, not all of us live close enough to such mountains, but we can still achieve satisfying results regardless, and we can still enjoy the experience of being out in the middle of nowhere during the night.
4. A flask of tea and some biscuits
These two items are especially important during the cooler months of the year. You’ll find that you’re standing around for quite a while, so it’s easy to get cold – nothing that a chocolate digestive and a nice cup of tea can’t fix.
If you’re finding that the equipment you have is limiting how much of the sky you can fit into your photos or how much detail you can capture, change your point of view, and include things that are closer, such as trees, lakes, and the landscape around you. You could even try to include people in the photos to add some foreground interest – this can work especially well when you’re camping.
The camera settings you’ll need will depend on the camera or camera app you’re using. One of the joys of digital photography is that you experiment over and over without having to worry about the cost of film and processing. Being able to see the results immediately gives you the chance to make adjustments very quickly, improving your technique with each shot.
Experimentation with your camera’s settings is the key – adjusting shutter speed, aperture, and ISO all combine to improve or ruin a photo. A shutter speed that is too short or too long may give odd-looking star trails – it’s surprising how far the stars appear to move in just a minute. Increasing the ISO (how much light the camera’s sensor detects) and lowering the shutter speed can help reduce the effects of star trails, but can introduce sensor noise.
While it does take some organising to go out and try night photography, and it requires some practice, the rewards of being outside, in the quiet night air, make trying this for the first time worth the effort.
* At the moment, lockdown and social distancing rules mean that many of us shouldn’t be going out to the countryside, so finding a decent place to try night photography might be difficult. However, these tips are just as useful even if you’re in your own garden. To reduce the impact of environmental lights on your photos, form some cardboard around your camera to reduce the amount of street lighting that is picked up in the photos. An old plant pot, with the bottom cut off, would also work well for this.